Authentication to AWS from GitHub Actions using OpenID Connect
In recent years, GitHub has developed an excellent CI/CD tool called GitHub Actions. It’s free for 2,000 hours of run time. Its primary benefit (aside from being natively integrated with GitHub) is the platform’s unique modularity and ease of use.
In this guide, I’ll show you how you can set up OpenID Connect (OIDC) authentication between GitHub and AWS, allowing your GitHub Action Runners to assume a role in your AWS account without static credentials.
How it works and why you should use it
The predicament of static credentials
OIDC isn’t new to the block, but it resolves a severe security concern if you are planning to use an external CI/CD tool to deploy your applications or infrastructure to your AWS environments: Static Credentials.
So, here’s how you had to set up many 3rd party applications with access to your AWS infrastructure before:
- Provision an IAM User and Attach a policy to it with the required application permissions.
- Generate a set of static programmatic IAM Credentials (an Access/Secret key) for the new user.
- Provide the 3rd party app with these credentials via some means (usually a secret).
- The application can now authenticate to AWS and do its thing.
Using static credentials in your pipelines is pretty concerning with the prevalence of supply-chain attacks and the increasingly complex capabilities of tools and methods used by malicious actors. Therefore, it’s now more critical for us than ever to ensure we implement the highest security standards on our pipelines.
Palo Alto have published a fantastic article on the atanomy of an attack against a CI/CD pipeline, and explains the potential effects of being compromised.
How GitHub <-> AWS OIDC Works
Before I discuss how OIDC works, it’s essential to clarify something: OIDC isn’t credentialless in a literal sense. However, it establishes trust between your GitHub resources and AWS so GitHub can utilise temporary credentials that are different every time a role is assumed and ensures you use the best possible security practices in your deployment pipelines.
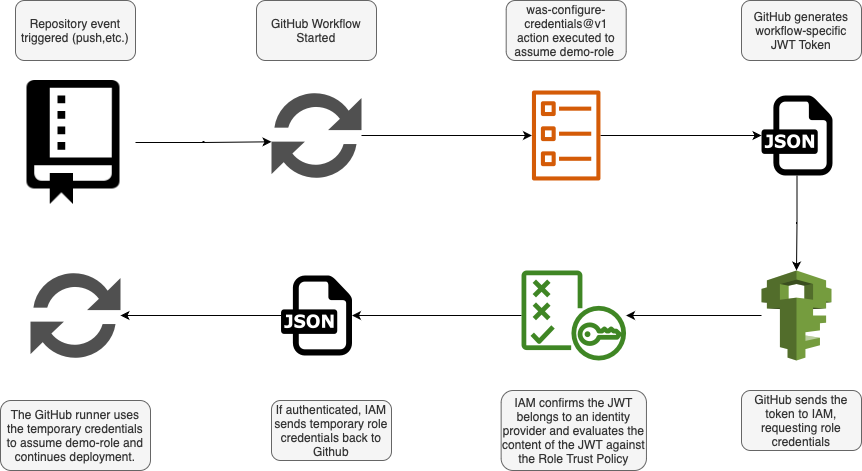
The process of authenticating to AWS using OIDC from a GitHub runner is as follows:
- You have specified the AWS-configure-credentials action in your GitHub Action Workflow
- GitHub sends a JWT Token to AWS containing information about the repository, environment, trigger, etc.
- AWS confirms that the sender of the token matches the thumbprint configured (to ensure it’s from GitHub and hasn’t been tampered with).
- AWS evaluates the trust policy of the requested IAM role and checks conditionals against the JWT token from GitHub.
- If the trust policy conditions match the JWT token sent by GitHub, AWS will return temporary IAM credentials to the GitHub runner to assume the role.
OIDC Considerations
There are some important considerations when implementing this. First, remember that by adding GitHub as an authentication provider into AWS, it won’t be able to assume any role unless you allow it to in the Trust Policy of the role.
Secondly, and most importantly, It’s vital to refer to the GitHub documentation (I’ll reiterate this several times) while implementing OIDC and ensure you enforce stringent Trust Policies so only the GitHub resources you intend to assume the role will be able to assume it.
IAM Roles Anywhere
IAM Roles Anywhere is important to mention, as it’s a potential alternative to OIDC - not only for GitHub but other platforms. If you’re currently using Access Keys to authenticate to AWS, consider using IAM Roles anywhere as an alternative. Of course, some situations, such as using a third-party SaaS application with AWS, require using Access Keys.
I’d suggest using OIDC over IAM Roles Anywhere because you don’t even require certificates, and (at least with GitHub) it allows you to create comprehensive and strict trust policies to ensure only the right resources can assume roles.
If you’d like to learn more about IAM Roles Anywhere, Chris McKinnel has published a great article on how IAM Roles Anywhere works, and and how you can set it up.
Implementing OIDC with GitHub and AWS
During this process, always refer to the GitHub Documentation to ensure you’re following best practices.
Adding the Identity Provider
Before we can start authenticating using OIDC, we must first add GitHub as an identity provider in AWS. Before we continue, I need to clarify - this doesn’t add GitHub accounts as an identity provider but instead adds GitHub actions as an identity provider.
For GitHub to access our account, though, we’ll need to create a role that trusts the identity provider so it can assume it.
So, let’s add it.
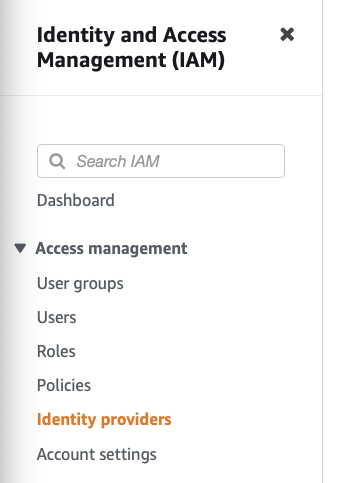
1) In the AWS Console go to IAM > Identity Providers.
2) Click ‘Add Identity’

3) Configure The Provider
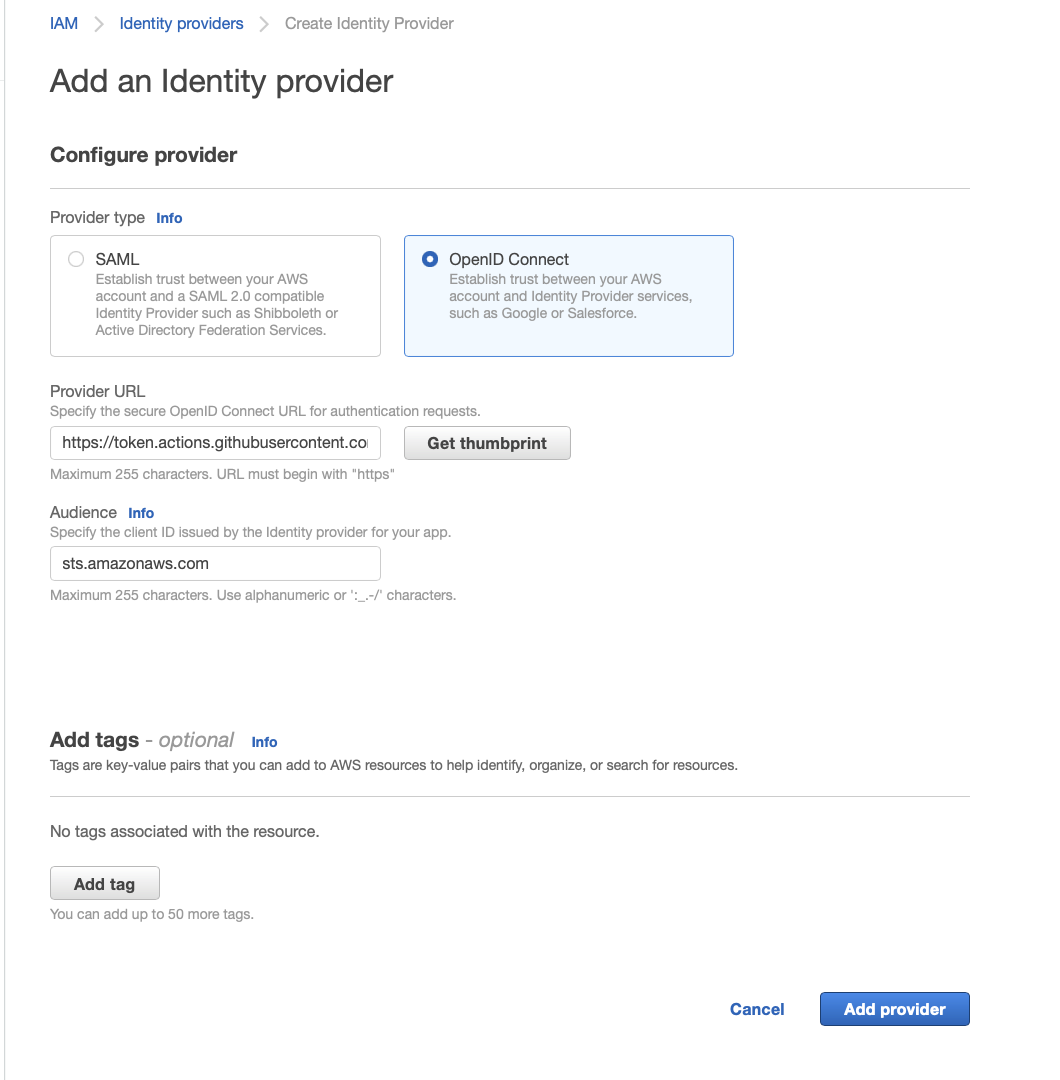
Just a note here - make sure you press get thumbprint and verify that it matches the GitHub thumbprint. Once you’ve done that, you can click add provider.
Adding the IAM Role
Now that you’ve added the identity provider, you can create a role that your GitHub Actions runner can assume. I’ll guide you through the process of creating a role that will allow all your actions in a particular repository to assume it.
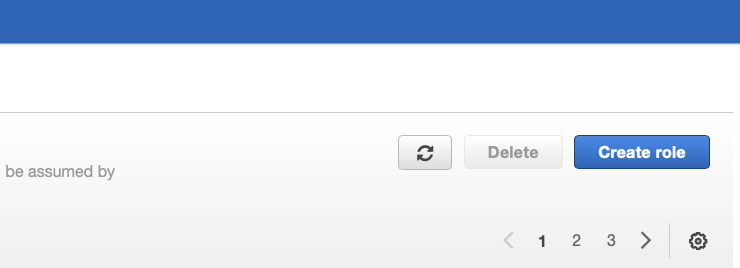
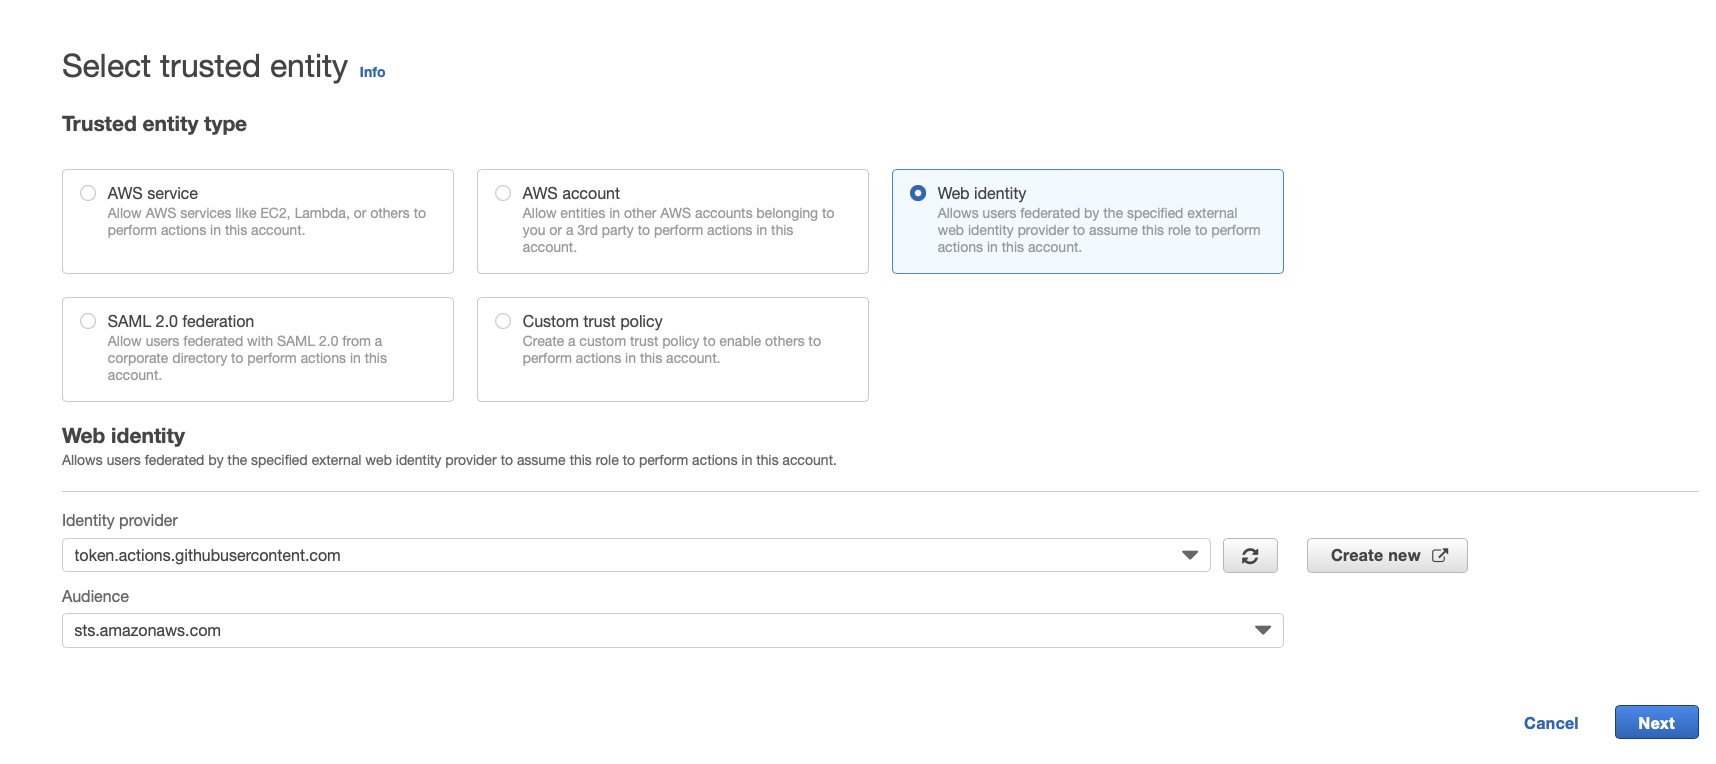
1) Create a new role
2) Select GitHub as the trusted entity
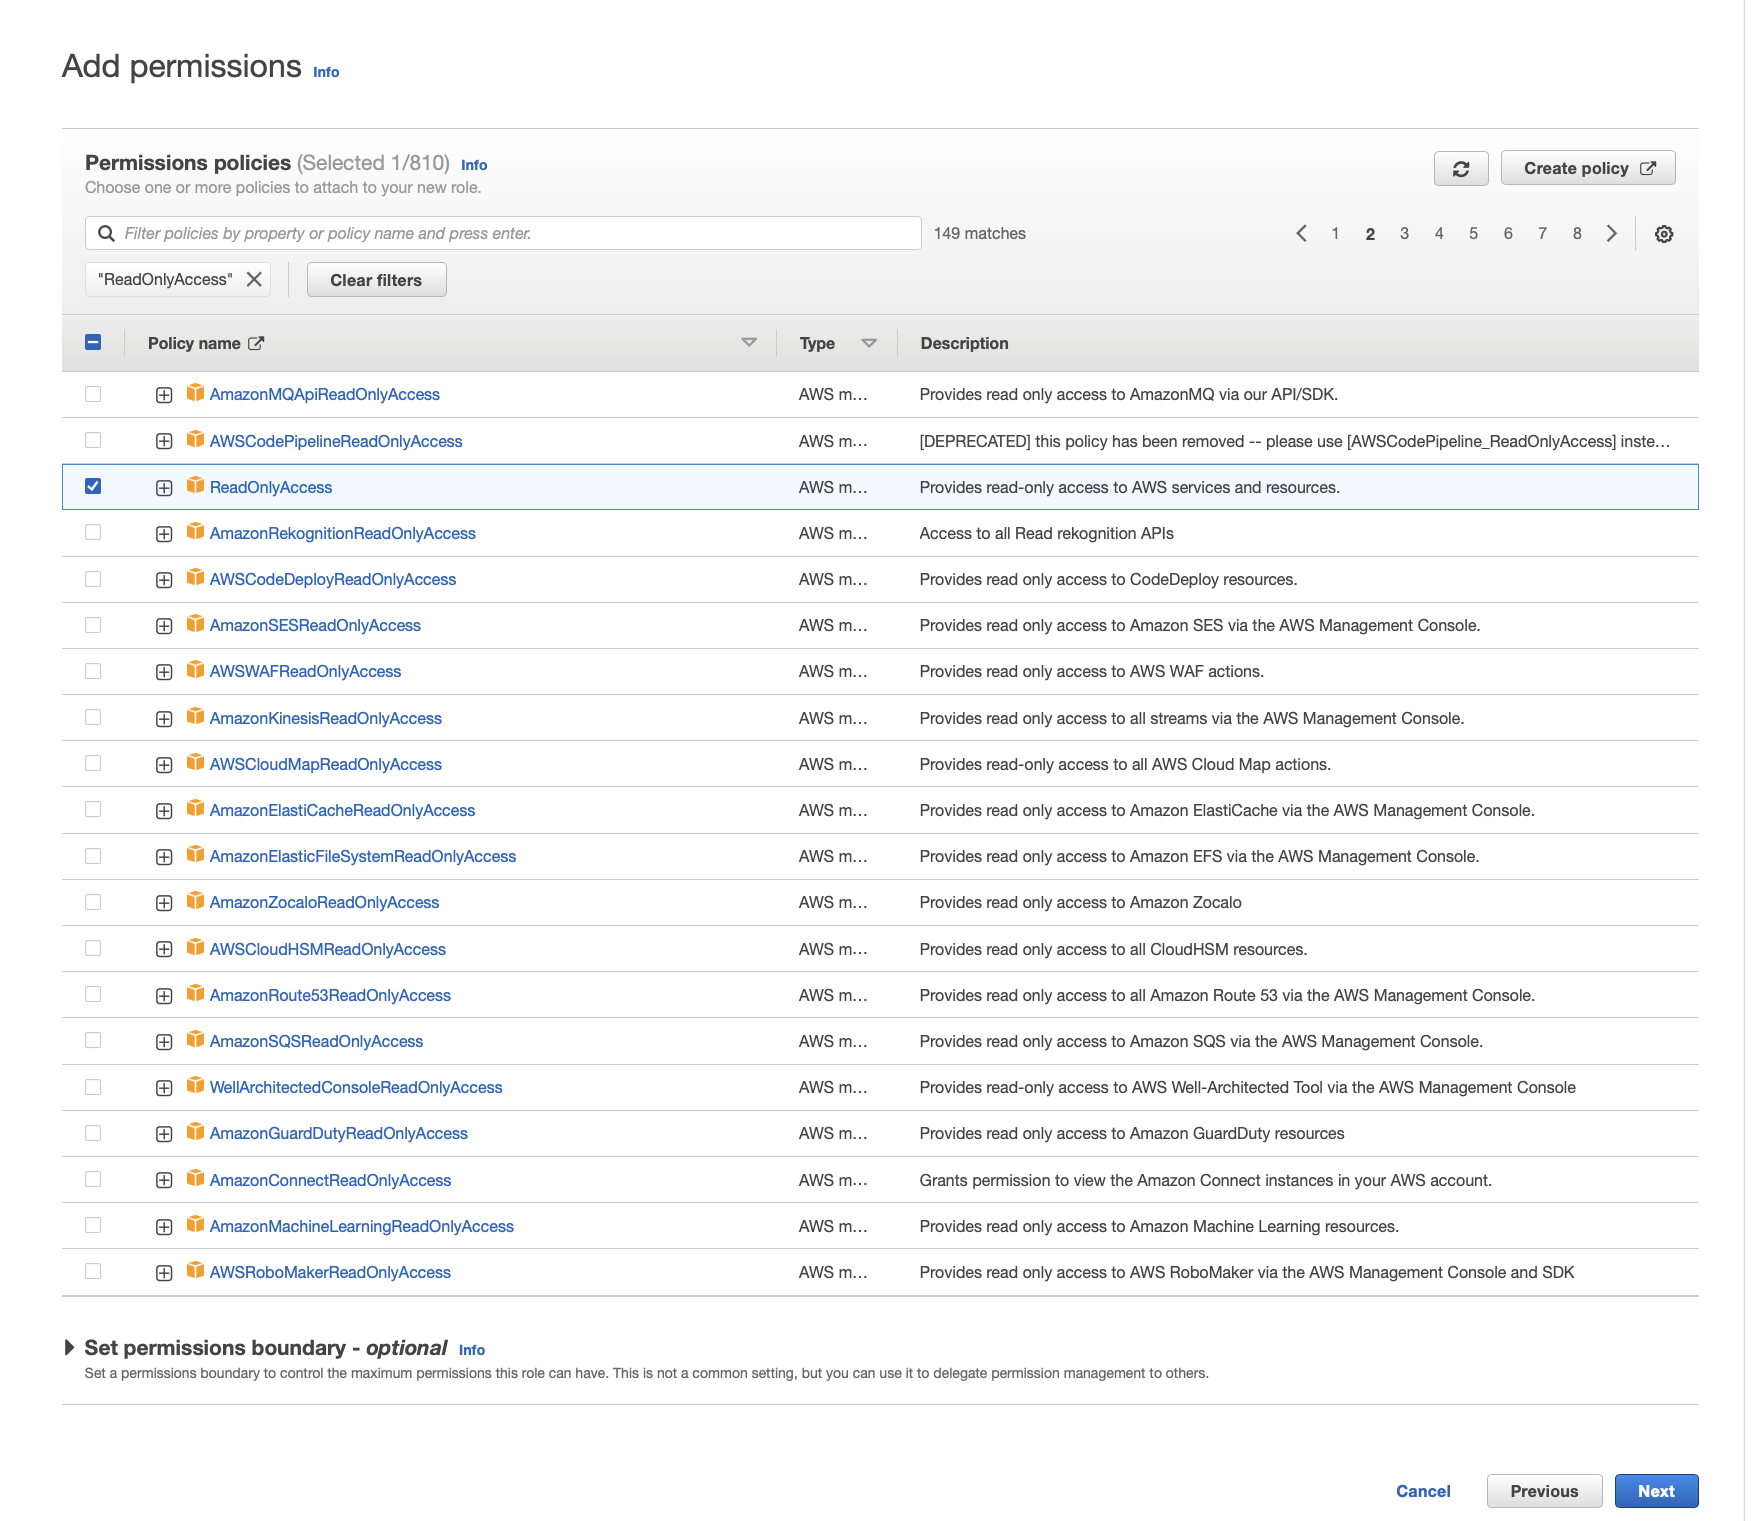
3) Choose a Permission Policy
note - I recommend always following IAM security best practices. Don’t just assign read-only access as I have!
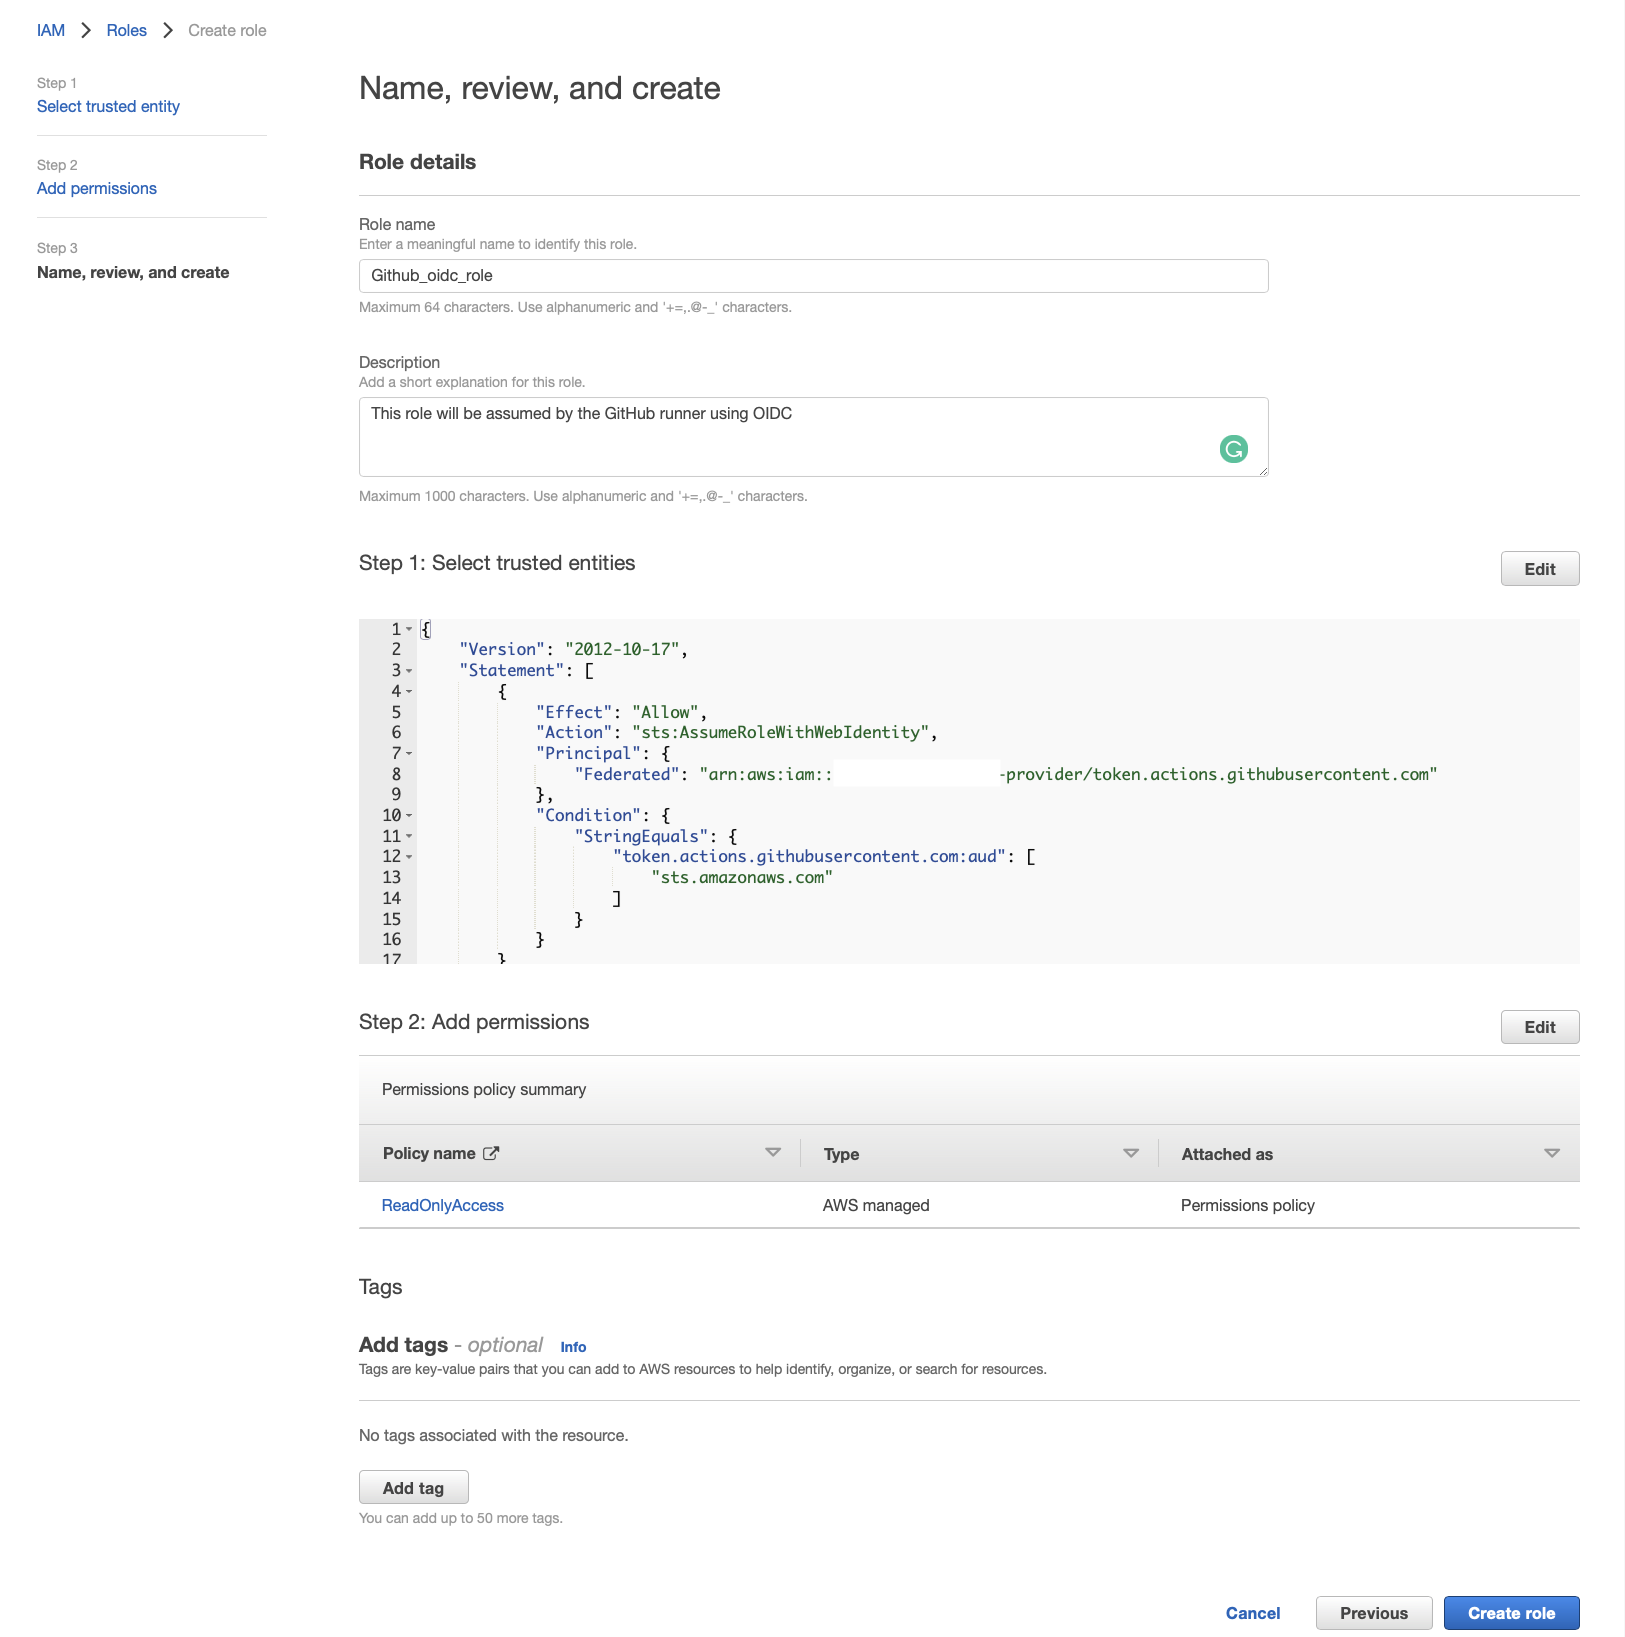
4) Review and Create the Role
In a production environment, you want to set up a stricter trust policy ahead of time (I’ll show you below) to ensure nobody can assume the role.
5) Edit the Trust Policy
Go to roles, choose the role you just created, and click on Trust relationships > Edit trust policy.

6) Harden the Trust Policy
Specify your GitHub repo to ensure that only your actions can assume this role.
Replace your trust policy with something like the following:
It’s probably self-explanatory, but replace the <account_id>, <repo_name> and <github_username> with the actual values
{
	"Version": "2012-10-17",
	"Statement": [
		{
			"Effect": "Allow",
			"Principal": {
				"Federated": "arn:aws:iam::<account_id>:oidc-provider/token.actions.githubusercontent.com"
			},
			"Action": "sts:AssumeRoleWithWebIdentity",
			"Condition": {
				"StringLike": {
					"token.actions.githubusercontent.com:sub": "repo:<github_username>/<repo_name>:*"
				},
				"ForAllValues:StringEquals": {
					"token.actions.githubusercontent.com:aud": "sts.amazonaws.com",
					"token.actions.githubusercontent.com:iss": "https://token.actions.githubusercontent.com"
				}
			}
		}
	]
}
7) Click Update Policy

Configuring your GitHub Workflow
Now, that’s all we need to do to configure the AWS side. Next, let’s configure the GitHub side. I assume you have a usable knowledge of GitHub actions, so I’ll paste code snippets, not guide you through the GUI.
1) Configure Token Permissions
For your GitHub runner to be able to generate the JWT token to send to AWS, you need to provide it with access in your workflow.
You can do this by putting id-token: write under the permissions key.
name: 'demo-workflow'

on:
  push:
    branches:
      - main

permissions:
  id-token: write
  contents: read

jobs:
  demo:
    name: 'deno-job'
    runs-on: ubuntu-latest
    environment: dev

  defaults:
    run:
      shell: bash

  steps:
    - name: Checkout
      uses: actions/checkout@v3
2) Assume The Role
Now, you can assume your newly created role using the configure-AWS-credentials action. You won’t need to specify any credentials for this, as it will reach out to AWS and request temporary credentials.
name: 'demo-workflow'

on:
  push:
    branches:
      - main

permissions:
  id-token: write
  contents: read

jobs:
  demo:
    name: 'demo-job'
    runs-on: ubuntu-latest
    environment: dev

  defaults:
    run:
      shell: bash

  steps:
    - name: Checkout
      uses: actions/checkout@v3

    - name: Assume the role
      uses: aws-actions/configure-aws-credentials@v1
      with:
        role-to-assume: "<full_role_arn>"
        role-session-name: GitHubRunner
        aws-region: <your_aws_region>
Add your additional steps below, as you should be authenticating with AWS now!
You can verify it works by checking your GitHub jobs and confirming it’s succeeded.

Best Practices
We just set up a basic implementation of GitHub OIDC. In a production environment, you’ll want to ensure you do more planning around your roles and workflows and utilise secrets and permission boundaries. You’ll also want to harden your trust policies further to ensure the role is only ever assumed as intended.
GitHub has a great article about hardening your IAM Role Trust Policies with OIDC and provides you with examples of specific configurations.
Secondly, make sure you read AWS Security best practices in IAM and follow them like your life depended on it. Even though you might benefit from the security improvements of OIDC, you must always prepare for the worst, so ensure your policies are configured with least-privilege.
I’ll recap some of the insights from the above articles, as well as include some of my thoughts (I’d really suggest you read them though):
1) Tighten the scope of trust policies
Tightening your trust policies is self-explanatory but still worth mentioning. Tighten down your trust policies and ensure it matches your workflow triggers exactly. For example, if you are running an action on a push to the main branch, ensure you specify this branch in your trust policy so the policy can be tighter.
2) Use Separate Roles for Testing and Deployment
Utilise the practice of least privilege, and ensure any workflows that aren’t deploying your code have read access to the resources they need. Then, following the above tip, make sure to restrict the trust policies on these as tight as possible and ensure your deployment roles are as limited as possible to prevent any accidental deployment or abuse if your repository gets compromised.
3) Secrets, Secrets, Secrets
Only expose information you need to in your workflow. Your IAM role ARNs should be secrets, not only because you can change them from a central place but because it prevents anyone with access to your repository from getting your account ID or the role name. Utilising secrets is especially crucial if your GitHub repository is public.
4) Restrict IAM Administrative Access
Ensure you restrict who can modify your IAM permissions, create roles, modify roles, and trust policies. Adding GitHub as an Identity Provider gives you much security by authenticating using temporary credentials. However, someone cutting corners, or even someone malicious, could create a role with a lenient trust policy to assume the role using a GitHub runner.
I recommend using an IaC solution like The AWS CDK or Terraform to provision your IAM resources using a CI/CD Pipeline with protected branches to ensure all changes get authorised and recorded. You can then prevent users from modifying IAM permissions in the AWS console.
Another approach would be to use a dedicated account, set up the GitHub Identity Provider in that account and assume an initial role, and use the AWS CLI to assume another role in another account in your actions, but this could be complex and tedious to set-up, so I’d recommend the above approach.
Final Notes
Thank you for reading my post and I hoped you learned something.
If you have any questions around setting up GitHub OIDC, feel free to message me on my LinkedIn. Keep in mind, I might not always reply fast, but I’ll always reply.